Cyanotype | Creating Botanical Prints with Alternative Printing Process
Creating Botanical Prints with the Traditional Printing Process of Cyanotype. I finally made the leap back to my photographic roots and joined traditional print enthusiast Janus Boshoff for workshop on the Cyanotype process at the Alternative Print Workshop. This process uses light sensitive metal salts and the sun to create photographic “blueprints” of objects.
Anna Atkins
I became interested in this technique upon discovering the work of botanist Anna Atkins. Besides being one of very few female photographer’s involved in these early stages of the medium, Atkins made history when she compiled her photograms of dried algae into the first book ever to be published with photographic illustrations: Photographs of British Algae: Cyanotype Impressions (1843). This collection is available for Public Domain Review online.
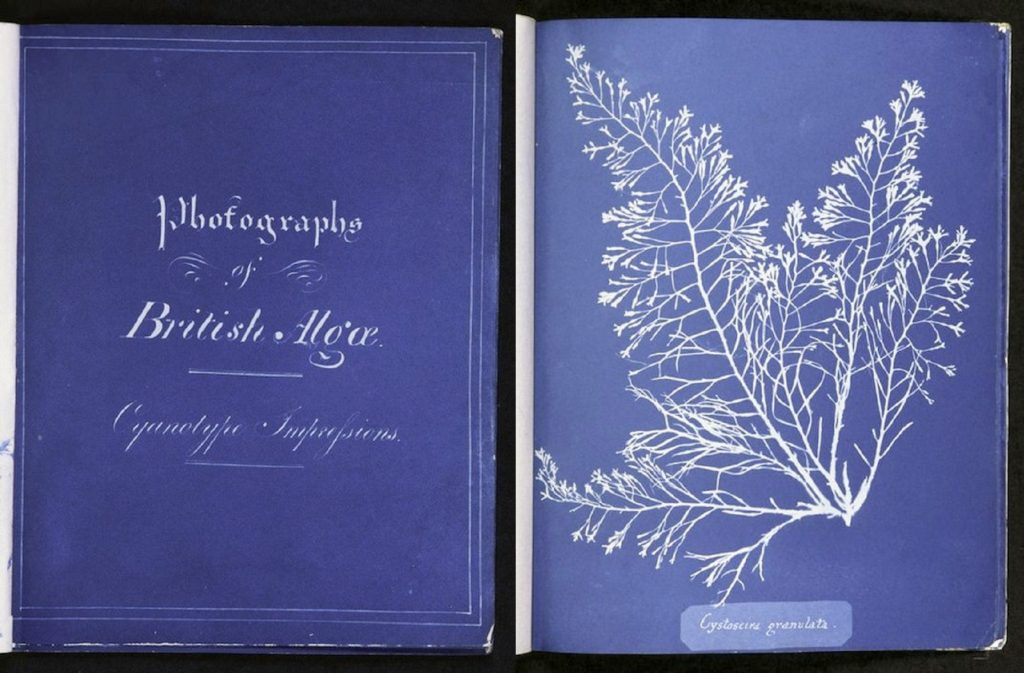
“Photographs of British Algae: Cyanotype Impressions” by Anna Atkins
Cyanotype Process
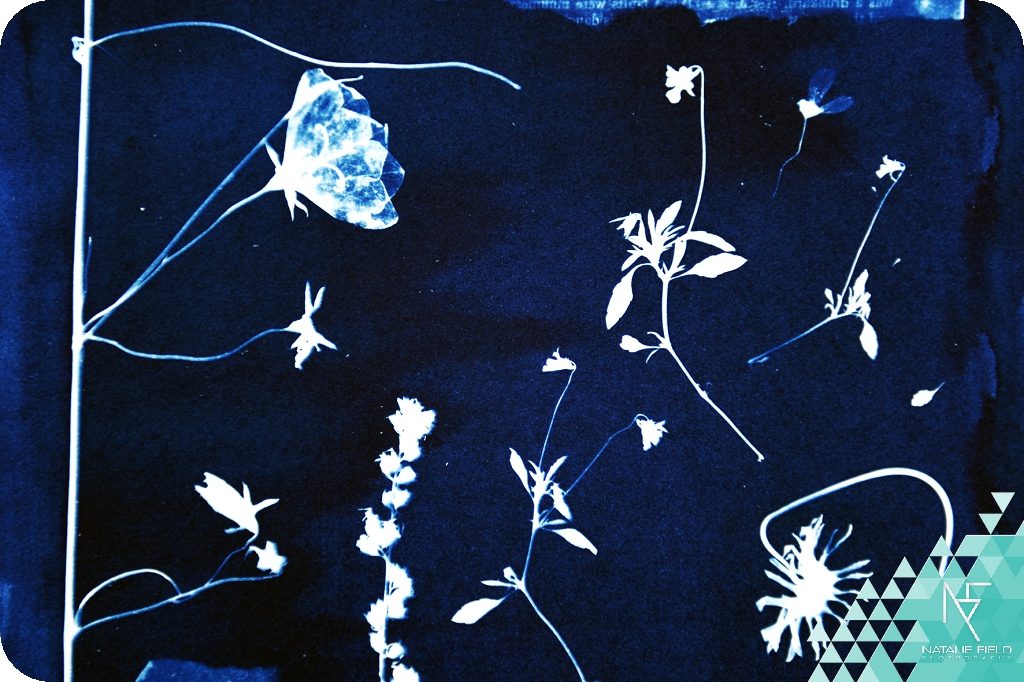
The technique was first developed by scholar Sir John Herschel in 1842, predominantly as a means to copy his notes on astronomy. Herschel’s process requires the use of two chemical compounds, Potassium Ferricyanide and Ferric Ammonium Citrate. Mixed together in equal parts, this concoction becomes light sensitive for up to an hour. The chemicals are best applied to a fibrous paper, like that used for watercolour painting. This allows the image to form inside the paper rather than on the surface, resulting in a picture with softer focus and greater tonal values.
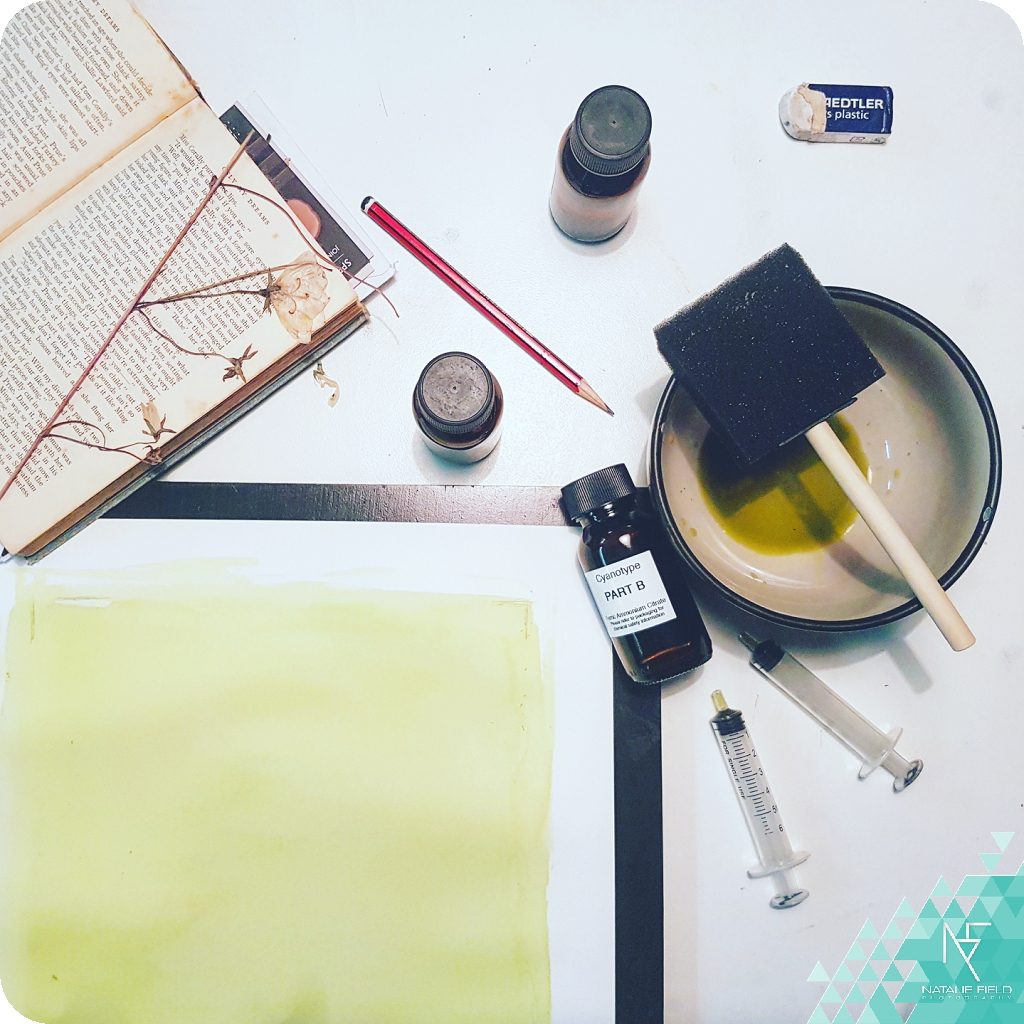
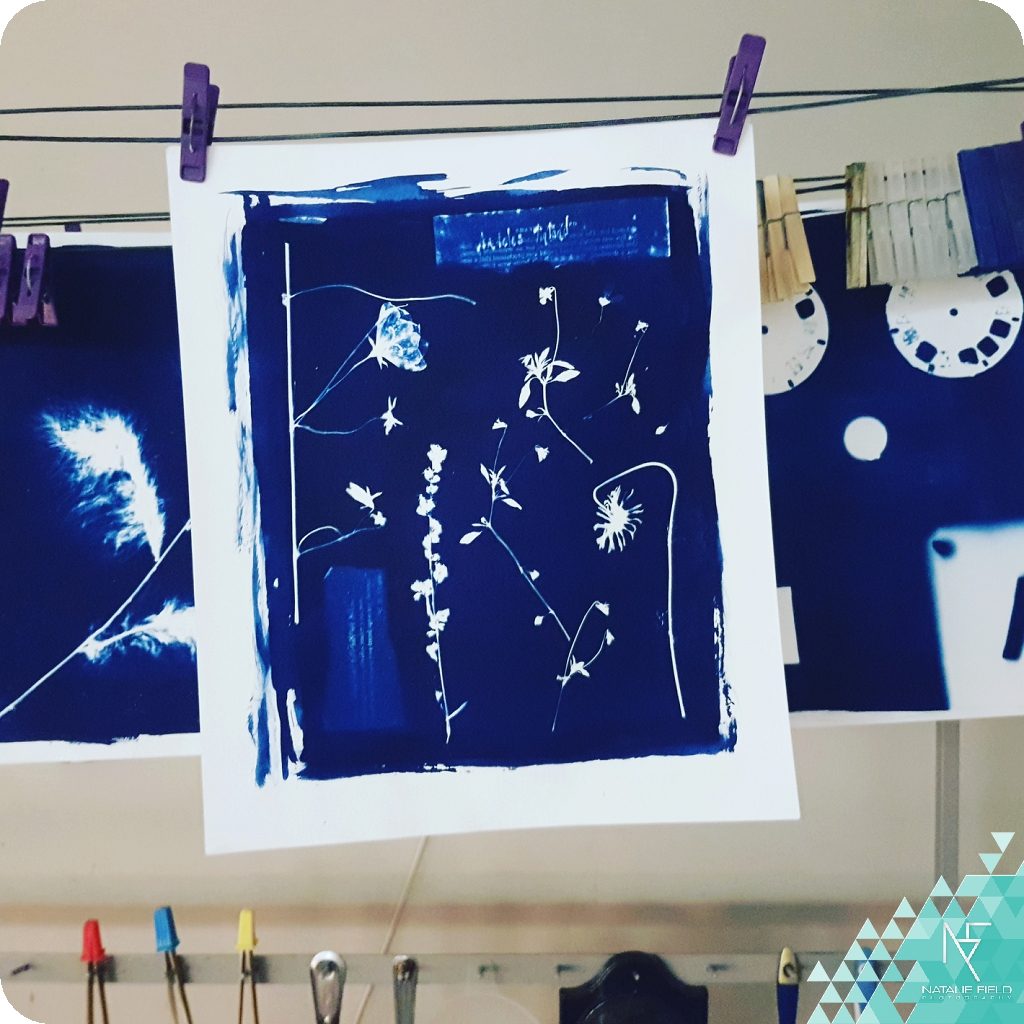
Apply the chemicals with a soft brush or sponge, considering the artistic value of the edge. The paper is then allowed to dry before the photogram is created. Take this time to consider your composition, or speed things up with a hairdryer if you can’t contain your excitement. Place the objects for reproduction on the prepared paper. Have some fun with the creative process by influencing the chemical process with the addition of water or sugar splashed onto the page. Lastly, cover the arrangement with a piece of glass to prevent wind from moving any of the elements around.
The prepared plate is then exposed to direct sunlight for around ten minutes. I expected to see the shift to cyan during this process, rather, the tones faded substantially. It was only once the elements were removed that the slight hints of cyan underneath became visible.

The last step is to wash the water-soluble chemicals from the print, preventing any further development on the paper. The “blueprint” finally reveals itself! And the print is hung to dry.
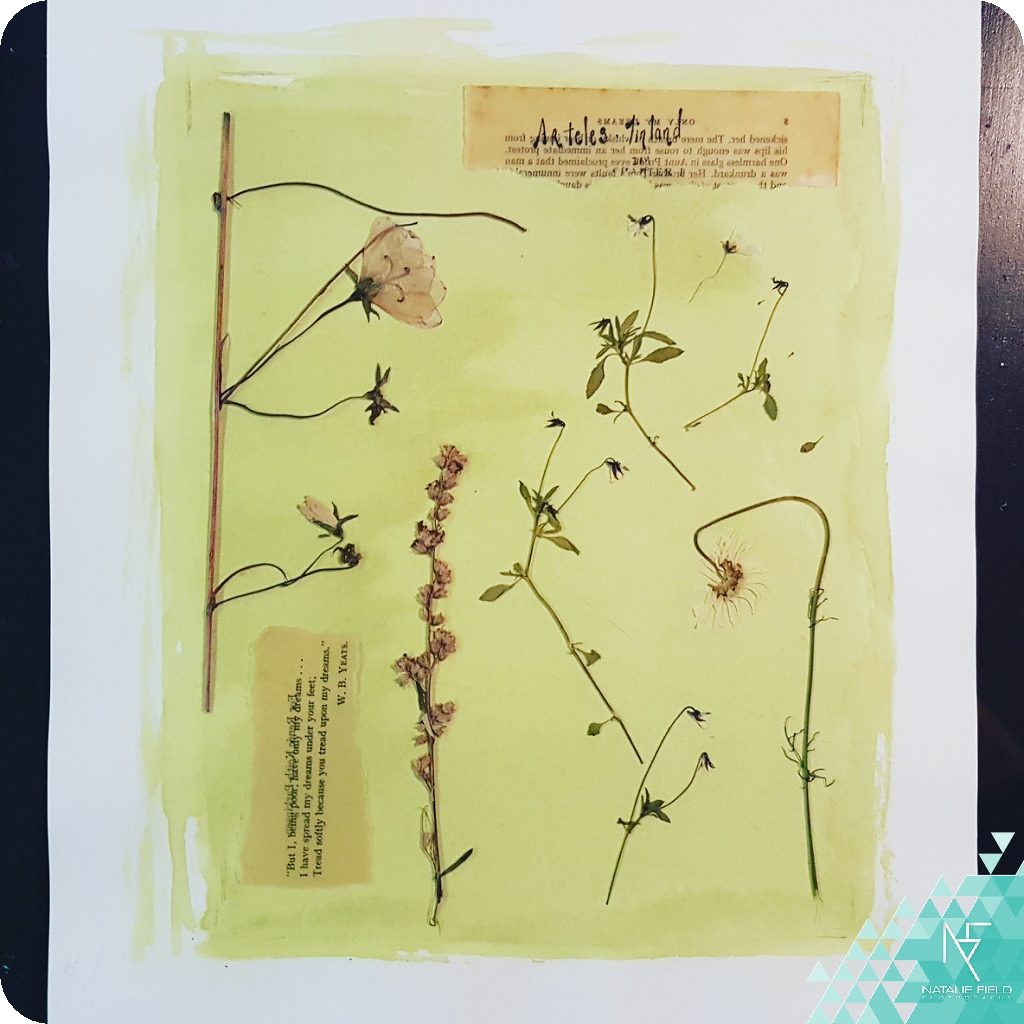
A “Blueprint” of Finland
As mentioned, this project was inspired by the cyanotype botanical prints created by Anna Atkins. As such, I wanted to experiment with my own botanical specimen collected during my artist residency at the Arteles Creative Center in Finland in 2016. I also had a light-bulb moment to tear the relevant pages from the book where I had made annotations on the collection. I treated the paper with oil to make it more translucent for the light to pass through.

Working with Negatives
Our second image was created using a negative produced from a digital file. For this I worked with an image captured at the Natural History Museum in London earlier in 2017. Again, I selected this image to reflect my interest in botany and entomology.

The result of this first test has inspired me to continue experimenting with the cyanotype process.
Off course, there is a lot more to the process than what I have shared, leaving much for the inquisitive artist to discover. That said, it is a relatively simple technique. And the perfect place to start for those wishing to rediscover the darkroom experience or enter it for the first time. And a process you can continue practicing at home!
Special Thanks to Alternative Print Workshop


I teach art classes to children, and have long thought cyanotypes are a cool art project. Alas, I have only once seen the required chemicals anywhere in a shop, and they were so hideously expensive I couldn’t remotely afford them. Anthotypes make for a cheap substitute (common food coloring works perfectly well, if you’re too lazy to squeeze plant pigments out of berries or whatever). But the problem is, you have to find a place where you can expose your plates for a week or so, where they won’t get rained on or interfered with, and that can be a big problem. I wish I could find some cheap chemicals, preferably something you could prepare from common household chemicals, that work as fast as cyanotypes!
Hi Brian, I think it is better to be safe and use professional chemicals, especially if you are working with kids. I have seen some fun projects where they take the transparency and place it over the leaf a the sun and as it dries it creates the image, something like that wouldn’t require any chemicals 😉